How to DIY a Crate and Barrel Nutcracker for Less than $20
How I created a Crate and Barrel Christmas nutcracker dupe using supplies I found around the house:
Welcome, friend! If you are anything like me, you are happily entering the week of Thanksgiving with one thing on your mind. Bringing out those totes from the attic to take inventory of CHRISTMAS DECOR, of course! I know, shame on us who celebrate Christmas too early by decorating prior to Thanksgiving. I never have been one for rules, so why follow this one? We spend hours getting our decorations perfect, and in my opinion they deserve more than a mere month to be enjoyed! Okay, my point has been made and I will step down from my holiday soap box. On to the reason you really came here... a Crate and Barrel nutcracker dupe you can easily DIY for under $20!
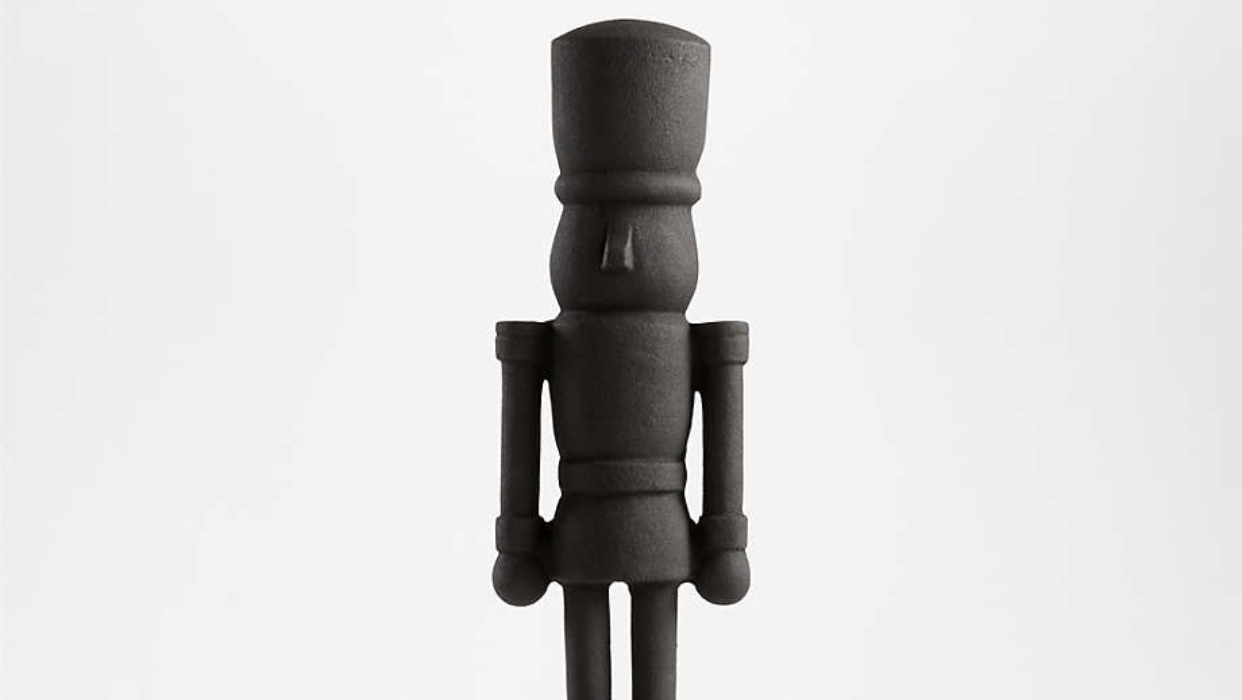
Let's start by checking out my inspiration for this DIY Christmas nutcracker dupe:
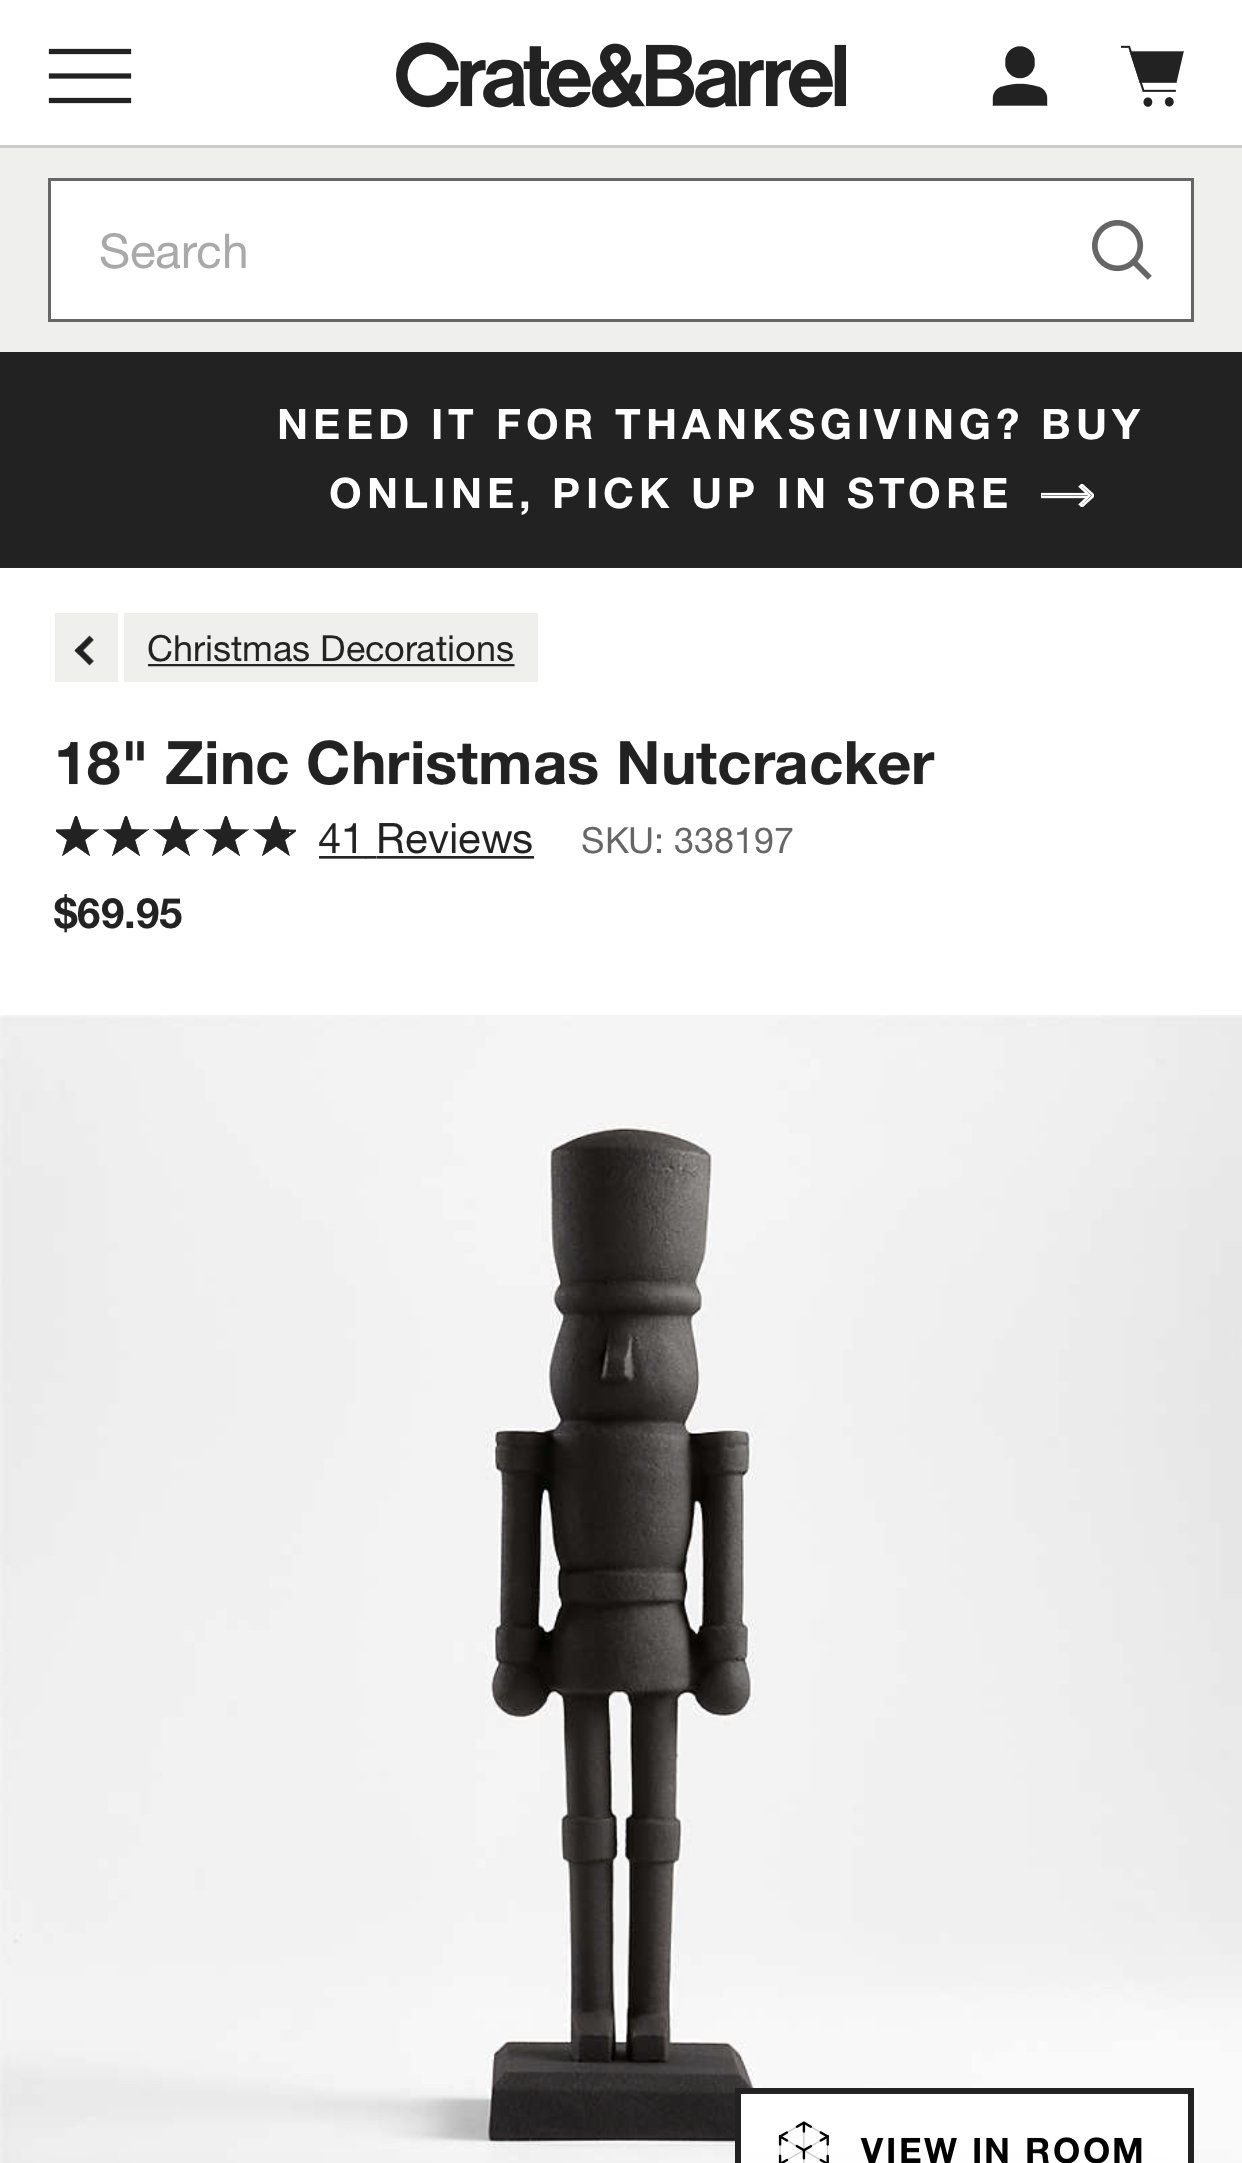
I'm not sure about your Christmas budget, but mine did not allow for $70 per nutcracker this year. I thrive on combining high-end decor with low-end dupes to create affordable, yet stunning design. This interior design principle also follows me into the Christmas season as I create a list with "splurge and save" columns to plan any new purchases. I had to carefully choose where I wanted to invest money in higher end items and where I can save money with DIY projects. For Christmas decor, I tend to splurge on timeless pieces I know will use year after year such as garland, trees, pillows, and decorative throws. Pieces I find on my save column include trending decor that I know made fade out of style after a few years. I adored this years trend of monochrome nutcrackers, and as well all know nutcrackers have waxed and waned in popularity since the 1990's. Thus, my decision was easy and I chose to create a high-end dupe for the nutcracker look I wanted so I can splurge in other areas.
A few things I loved about the Crate and Barrel Nutcracker: monochrome, texture, and simplicity. I chose to replicate each of these elements in my own DIY nutcracker dupe to create the designer look at less than half the cost! The most difficult part of this project was finding the perfect nutcracker (spoiler alert, I found exactly what I wanted at my favorite crafting store) which turned out not to be difficult at all! I will link both of my nutcrackers below because this deal is too great to pass up. I raided my supply stash for the paint needed in this project, but I will list what I used below in case you do not have any extra at home.
Crate and Barrel Christmas Nutcracker DIY Project List
- 24" wood nutcracker from Michaels- 50% off making it $17.99 (and it is taller than the C&B original!)
- 14" wood nutcracker from Michaels- 50% off making it $8.99 (I chose to use two nutcrackers of different heights to fit my design plan but feel free to use any height you prefer!)
- Chalk paint- You can choose any color you would like for your nutcrackers! I personally prefer chalk paint to acrylic or latex for this project because it dries matte and provides an extra layer of texture. I had Krylon Chalkboard Paint in Black in my garage so to keep cost low, that is what I used! I purchased this from Lowes but you can find it at most hardware stores.
- Baking soda- Yep, that's right! The official secret ingredient is baking soda. Mixing it with your chalk paint will give you the perfect texture to recreate the C&B look. More details about this below!
- Paint brushes- I chose to use a 1" chip brush that I had in my stash. I love using chip brushes on DIY projects because they create a beautiful texture without any extra effort! These can be found at hardware stores usually around $1. You can also use any small flat paint brush to get in hard to reach areas, but I was able to get full coverage using the chip brush!
Okay, friend! You have your shopping list and you're ready to get started! It's time to paint, so gather your supplies and put on some old clothes. Trust me on this part, paint always finds a way to splatter on my expensive leggings no matter how careful I am (yet I somehow never learn this lesson, but that's a story for another time). Don't forget to take a "before" photo of the nutcrackers to show the transformation your DIY makes!
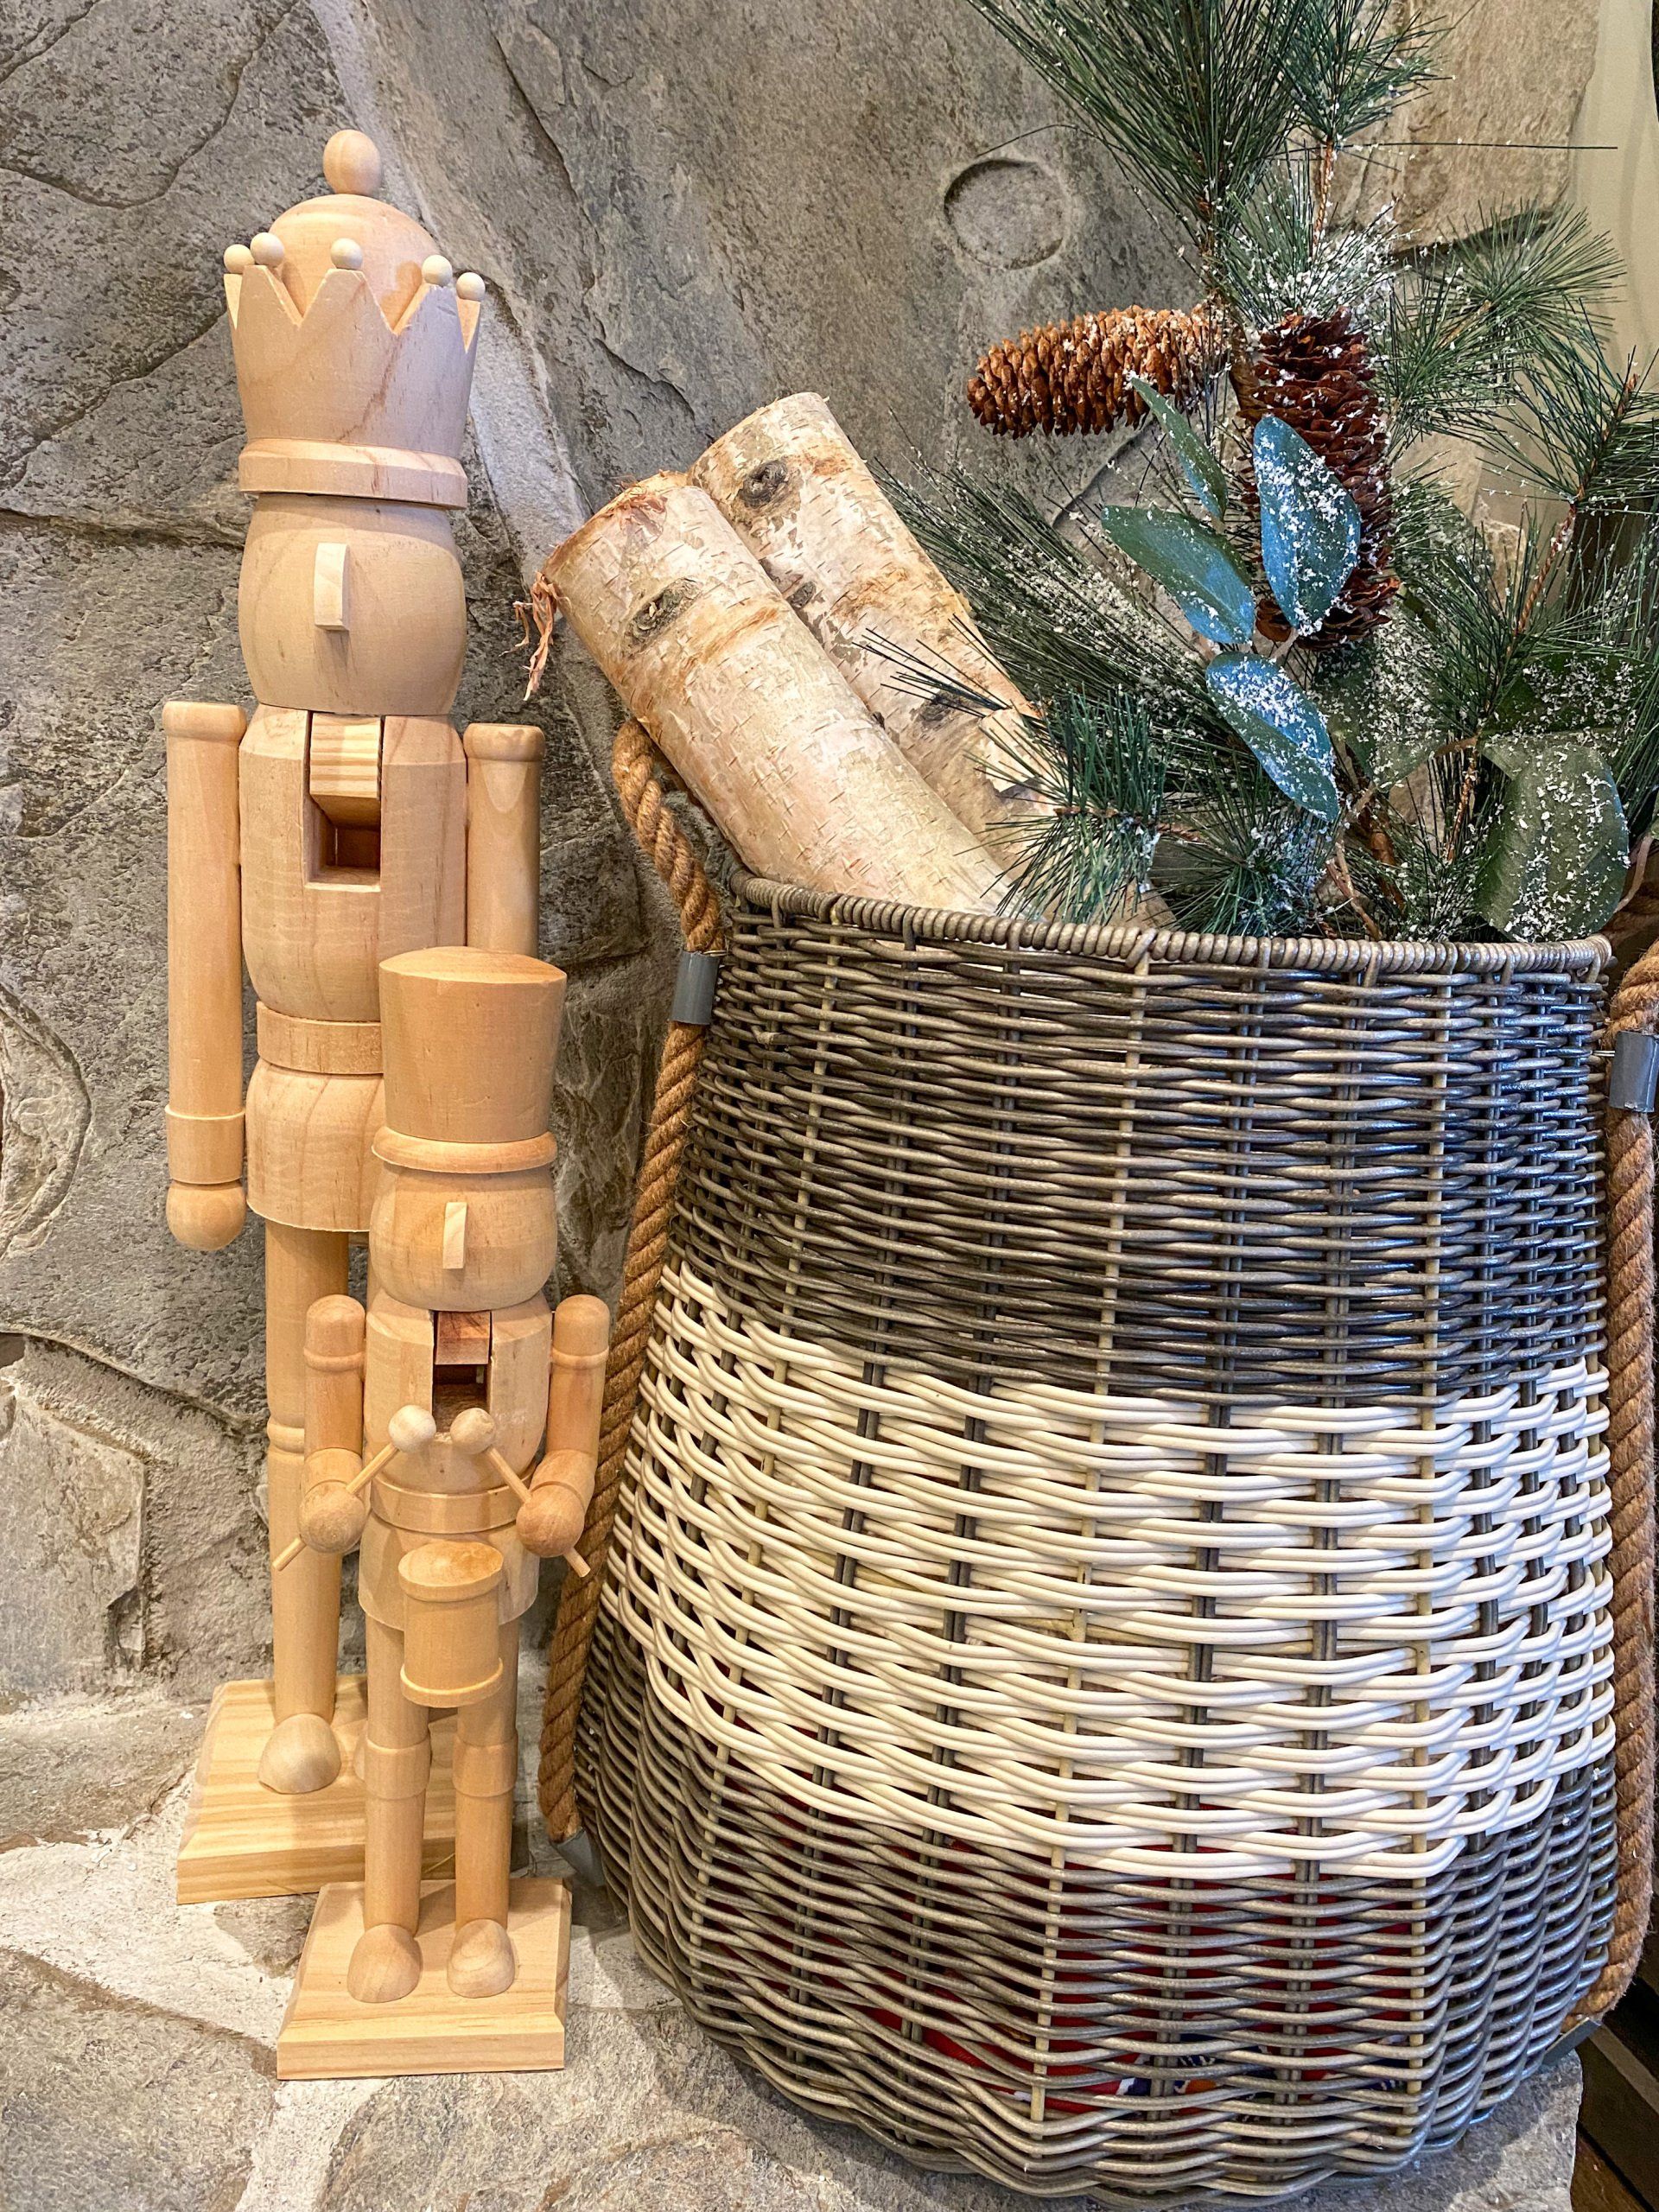

Alright, you have your paint clothes on and took your before photo. Next, find something around the house to create a barrier between your paint and workspace. You can cut open a large trash bag, spread newspaper, or lay out cardboard across your table. I chose to cut open a large trash bag because I converted my entire dining table into a Christmas DIY project extravaganza last weekend (stay tuned for those on upcoming blog posts!). Finally, it's time to get to business. Here is a list of the steps I took to create the my designer nutcracker dupes:
- Pour your chosen chalk paint into a container or on disposable plate. I lined a paint tray with aluminum foil to help with easy clean up, but you can do this step based on supplies you have at home.
- Paint first coat on your nutcracker (without any baking soda). The goal is to get a thin, even layer for your first coat. It is ok if some of the wood still shows through because your textured second coat will cover it all! Allow the paint to dry before moving to step 3. As always with DIY projects, the drying directions are open for interpretation. When I am painting furniture, I always adhere to drying guidelines... but not so much for crafting projects. As I said before, I am not one for rules. So I will be transparent in saying I let my first coat dry for about 30 minutes before moving to step 3 (oops). **Pro tip: keep your paint brushes covered in paint during this time or they will dry out and cause clumps in your paint. You can fold the ends of the paint brushes in aluminum foil if you intend to let the first coat dry over 30 minutes**
- Once your dry time is up, mix some baking soda in your chalk paint to create a textured second layer for your nutcrackers. I start with the general rule of 2 parts paint to 1 part baking soda and tweak my recipe based on the consistency. You want the paint to be thick enough that it creates your desired texture, but not too thick to where you can't get the mixture on your paintbrush. Clear as mud? These projects rely heavily on trial and error so you will have to see what mixture gives the results you are looking for! I wanted subtle texture, so my mixture was a similar consistency to thick pudding. Just enough to add texture but still be painted on easily. **Pro tip: do a trial run on any scrap wood you can find. If you do not have any at your disposal, you can paint the bottom of the nutcracker's footstand to see what your paint constancy will look like. Just beware that paint will spread onto your barrier once you sit the nutcracker back down.**
- I always start a new paint project with the area that has the lesser line of vision. AKA the back or the bottom in most cases. I started painting the back side of my nutcrackers to work out any kinks in my methods before moving to the front. When using my chip brush, I alternated between paint strokes and dabbing the edges of the brush onto the nutcracker to create various textures. I allowed this second coat to be thicker than my base coat as I wanted the textured paint to cover any bare spots left. A thicker coat means a longer dry time, which for me can be relative but I did want to make sure this second layer fully dried. I let them sit for an hour while I worked on other projects and determined they were dry to the touch, which in my world means they are safe to start decorating with! Again, I caution you to do as I say, not as I do. If you are painting thick coats, or even choose to do a third coat, then you want to atleast let the paint dry for 24 hours prior to decorating with your nutcrackers.
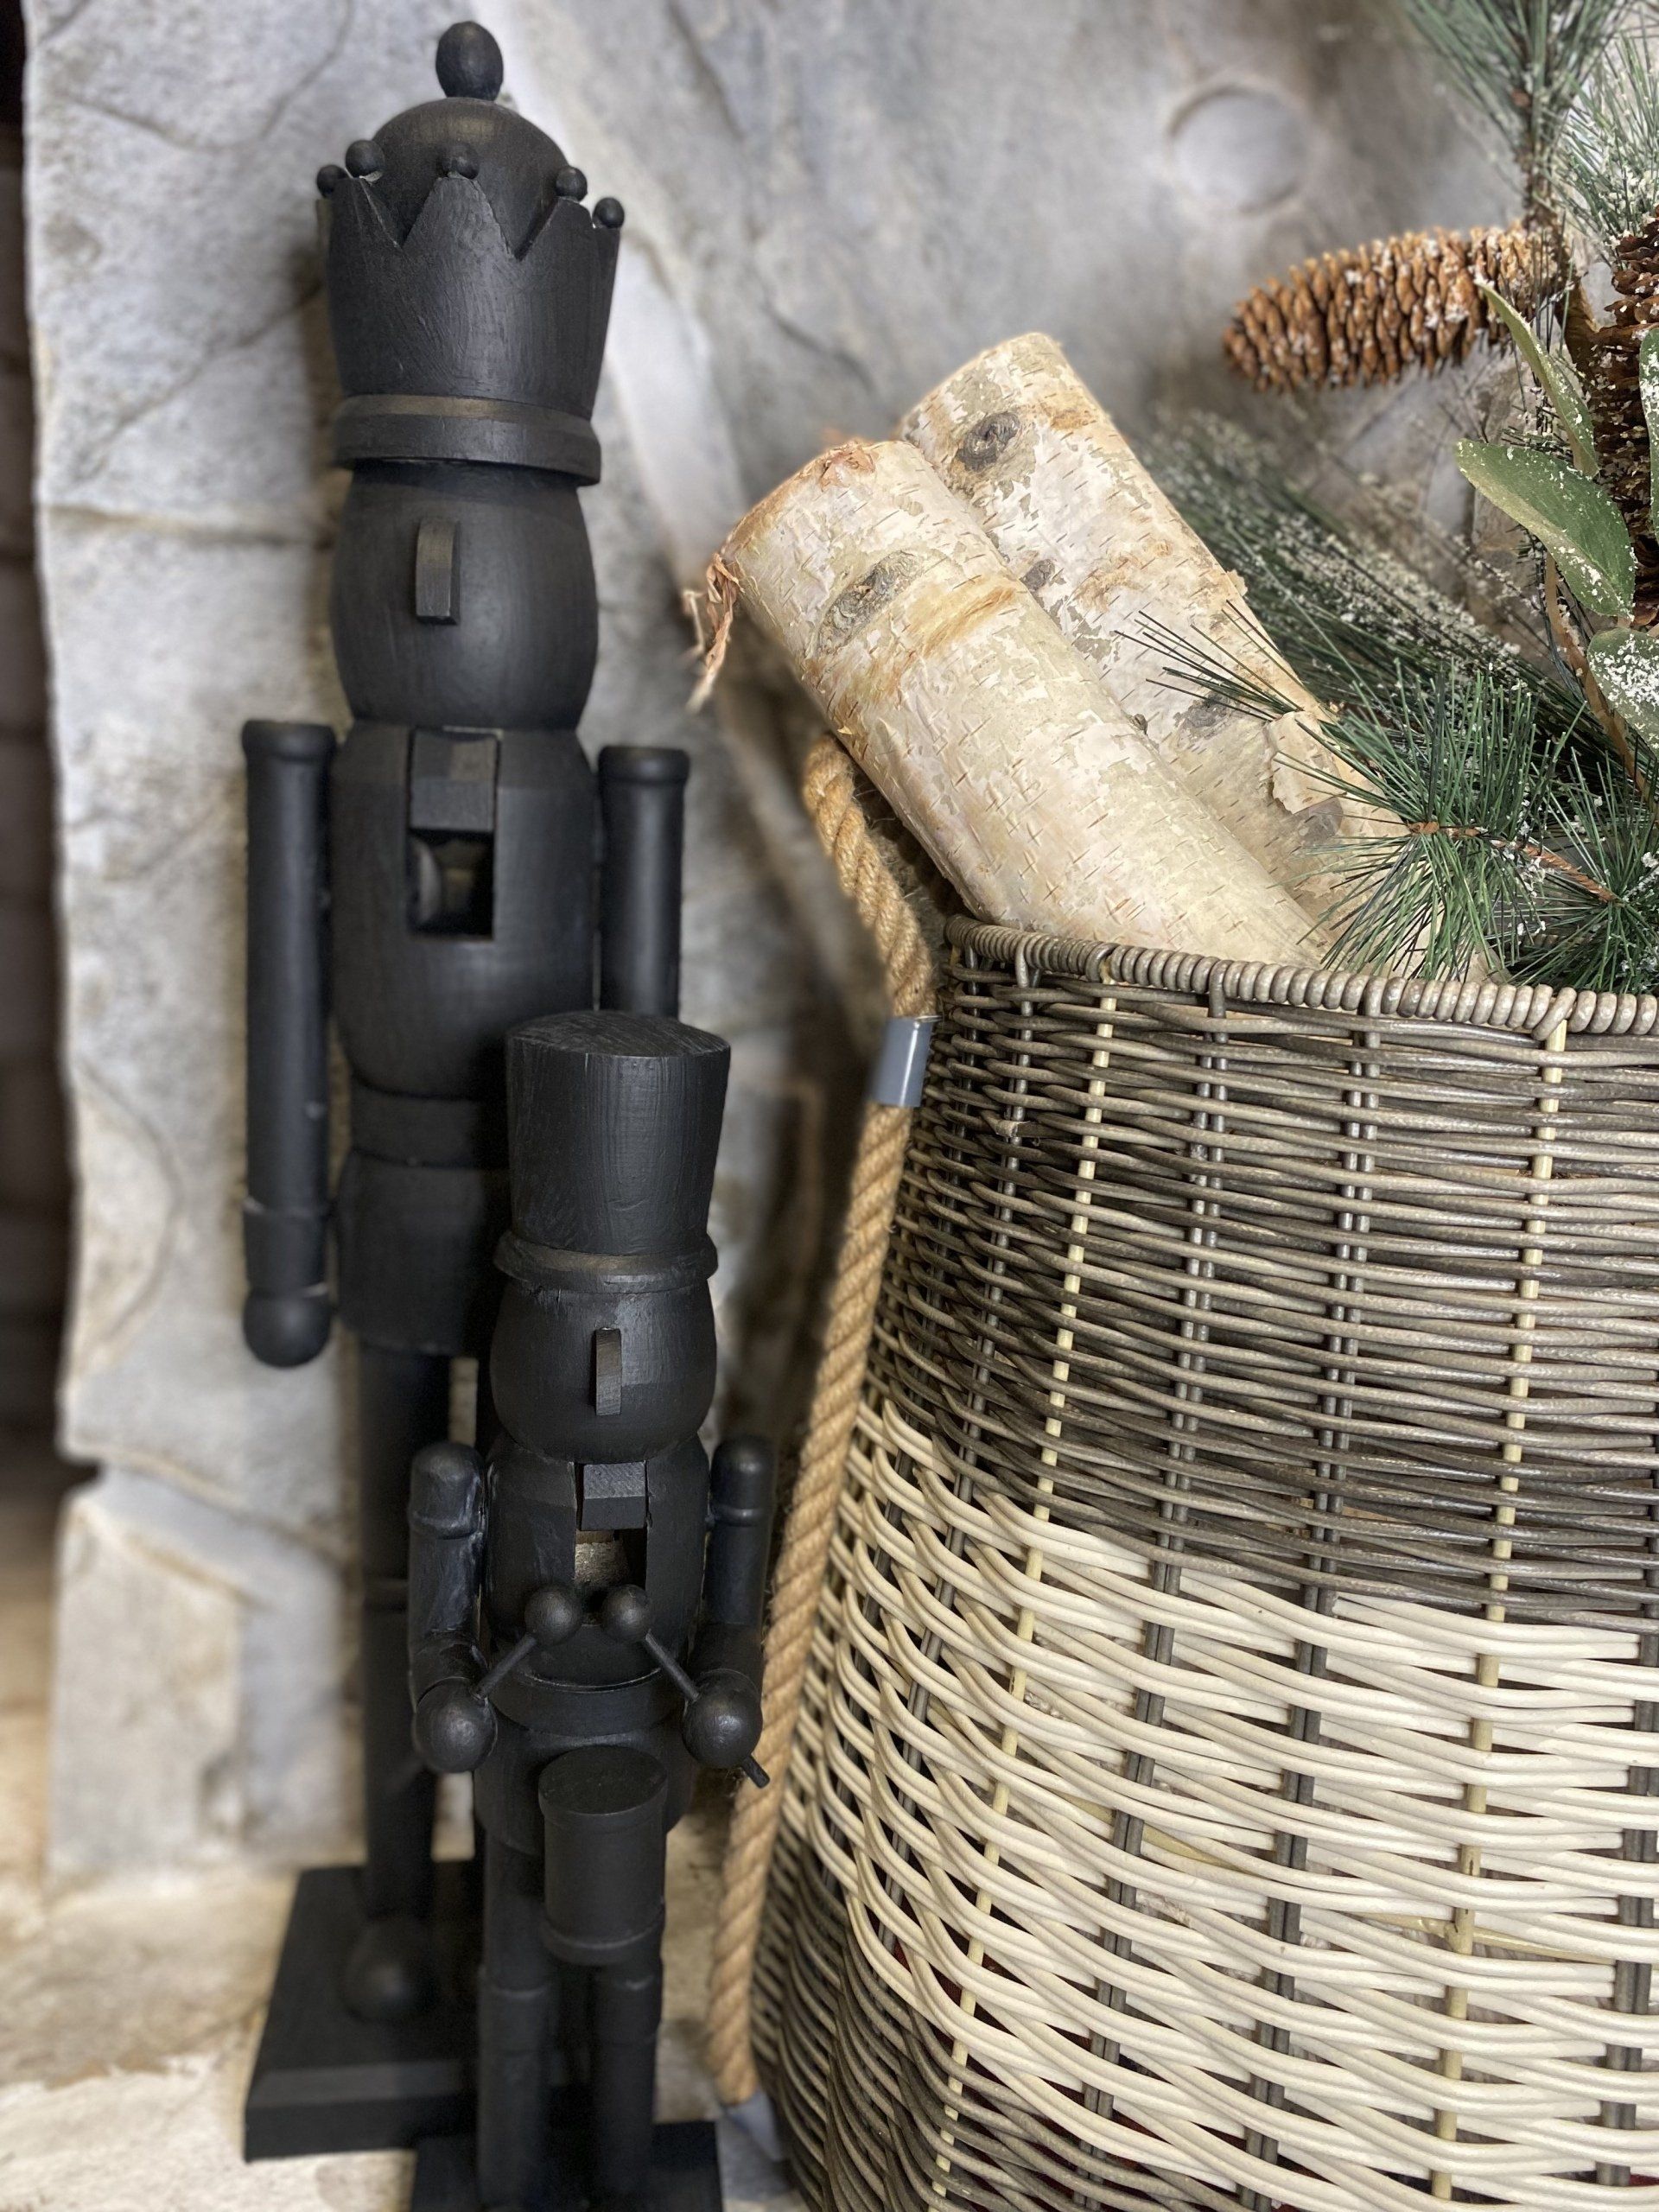
In true Whitley form, I chose not to adhere to my own knowledgeable advice. I placed the nutcrackers on my hearth to see if I had achieved the texture and contrast from the Crate and Barrel originals.
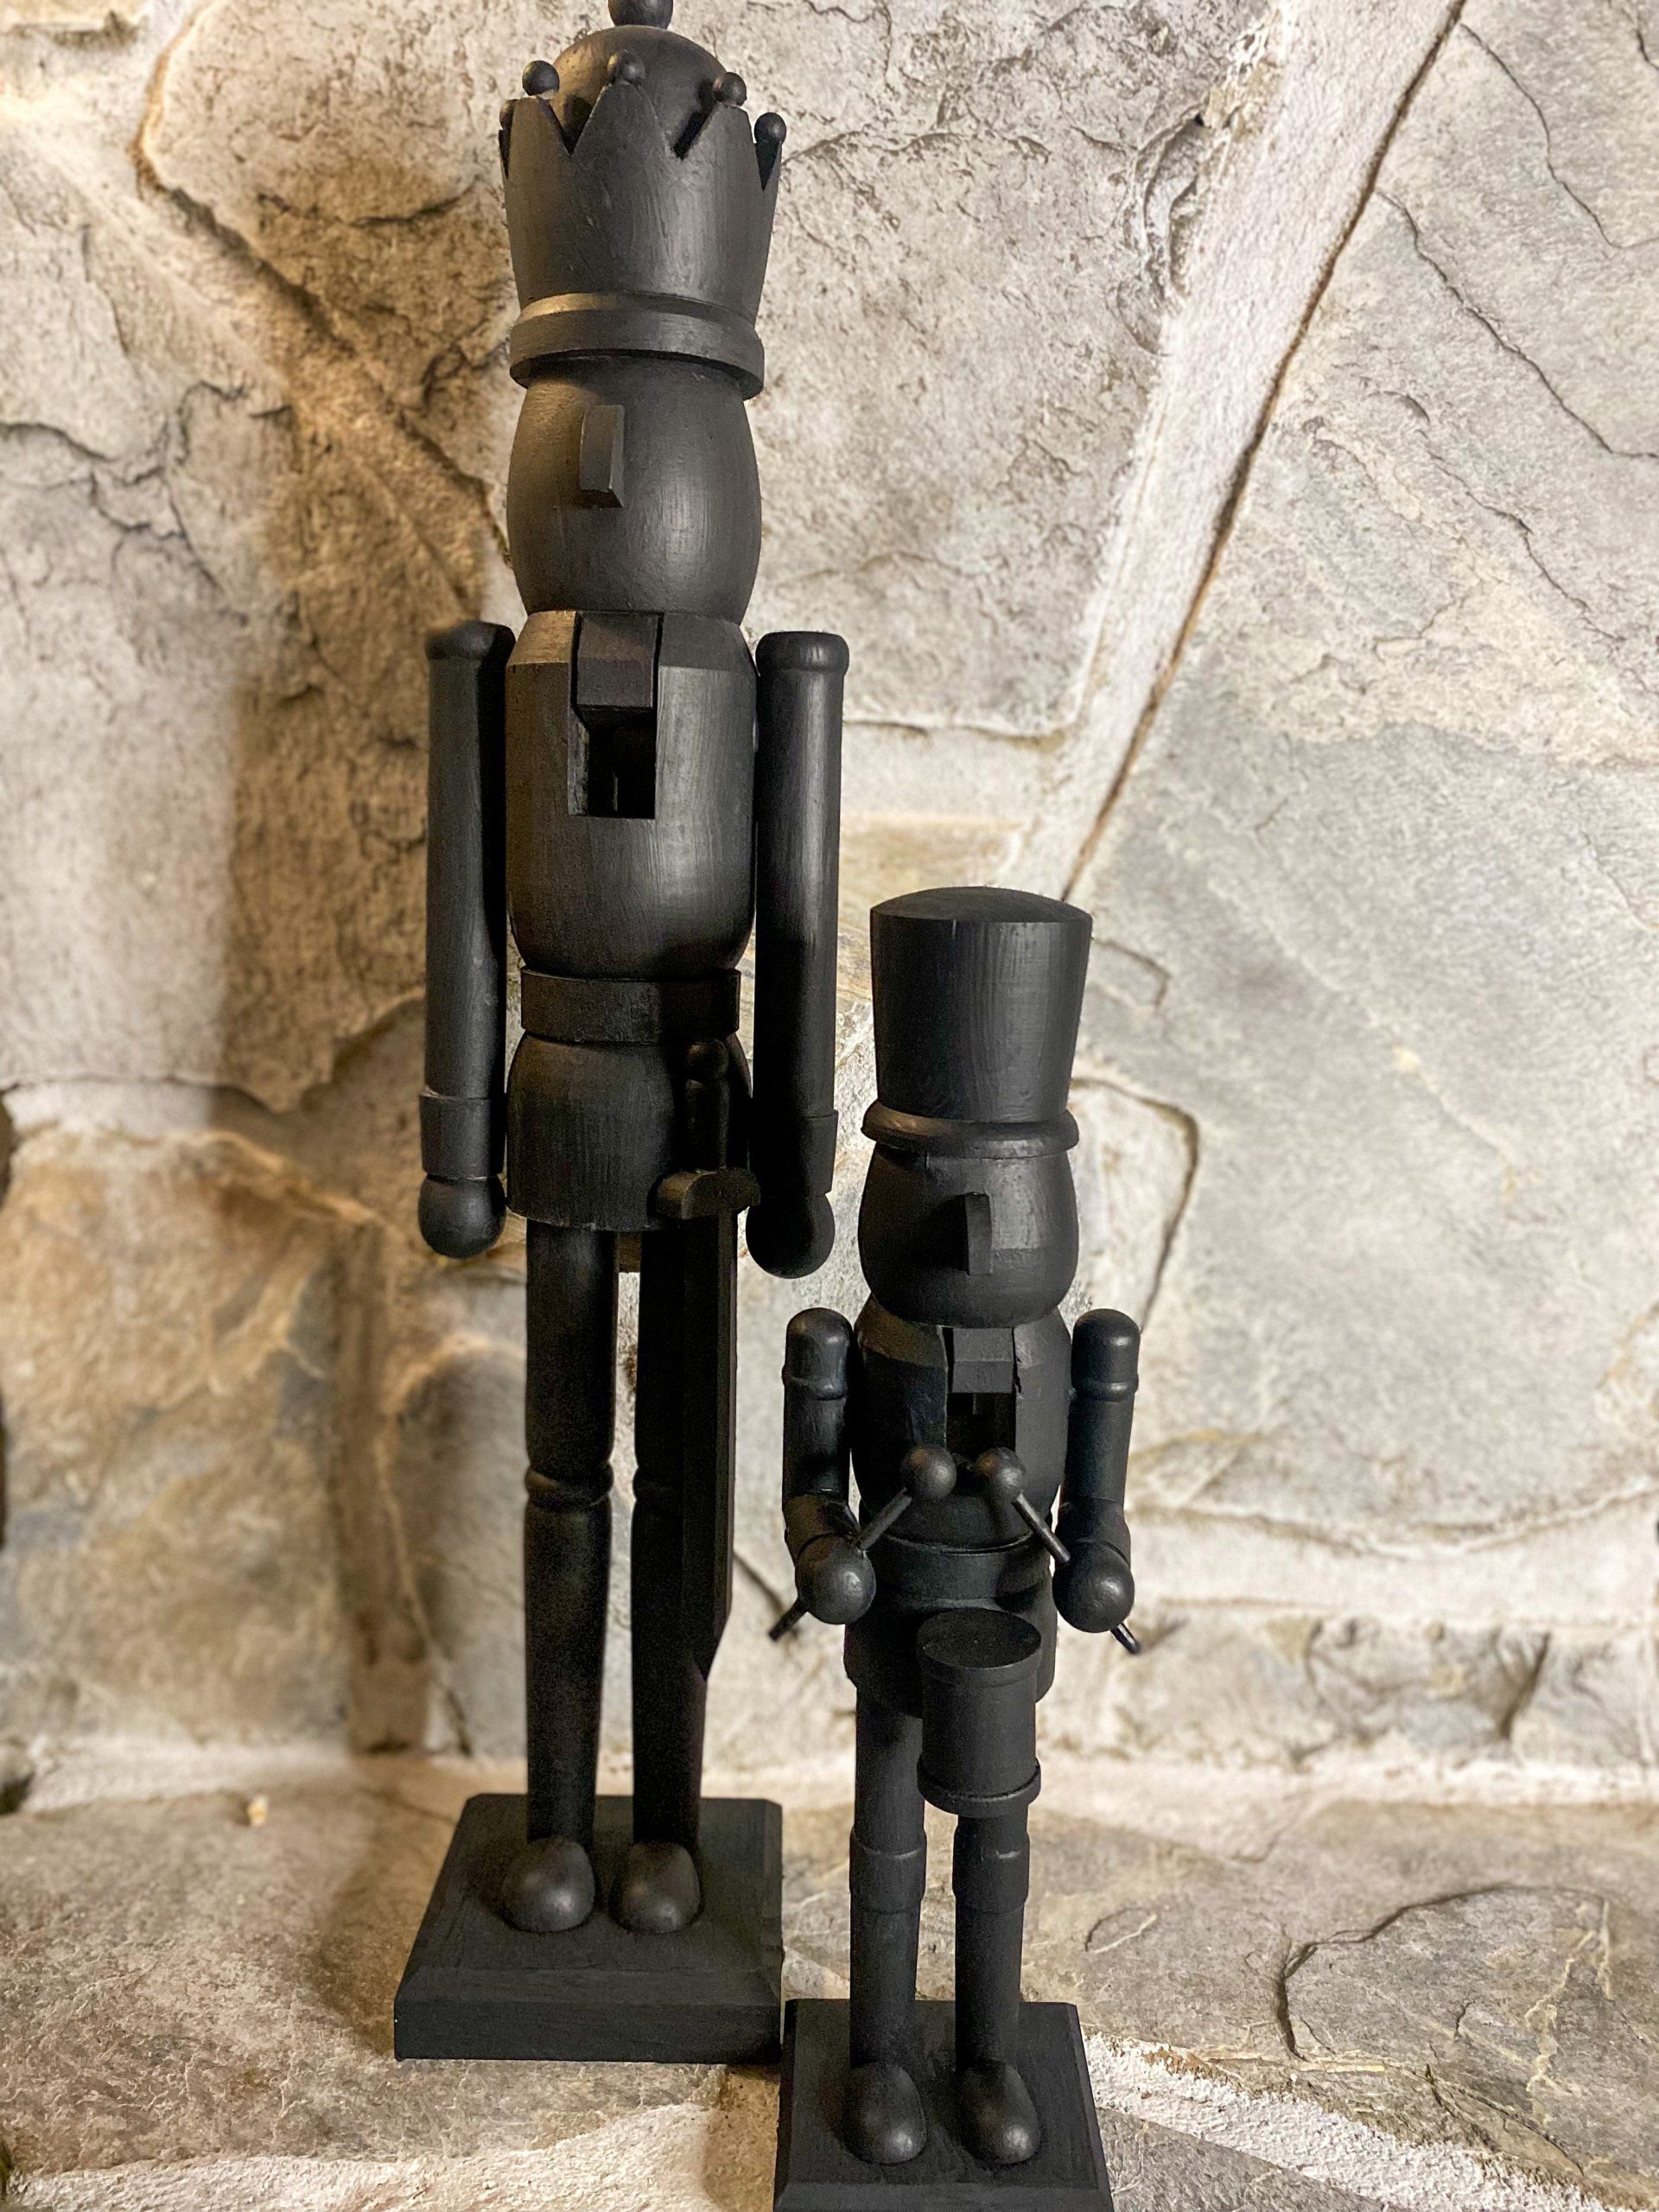
Success! I am quite proud of creating my own Christmas nutcracker designer dupe using supplies I already had at home. The beauty of this tutorial is that you can tweak it any way you like. Do you want a different color? Do you want to add a metallic sheen? Do you want to skip on the texture and have a smooth finish? The options are limitless! The best part? I finished this project and only the cost of the nutcrackers (which are currently 50% off at Michaels as a happy reminder)! Even if you had to purchase every item I listed for this project, your cost is far less than half the cost of one Crate and Barrel Nutcracker. Not to mention you will have excess paint supplies to create more nutcracker dupes, or even start another new Christmas DIY project! You can click here to look at all of my recent blogs if you need inspiration for your next DIY project.
I will end this blog with a side-by-side of the inspiration photo versus my Crate and Barrel Christmas Nutcracker DIY Dupe for less than $20. Feel free to leave comments and share, I would love to hear what you think of the end result! Thank you for taking the time to read through my tutorial and I hope you choose to follow along with my future projects. For daily updates and behind the scenes follow my instagram @thehouseofwatson.
Lastly, don't forget: If I can complete a project, so can YOU!